As an engineer of a steam engine, one must be able to feed and keep up with a well-set fire – or even start one at first. Unfortunately, since the 7¼" Feldbahn 0-6-0 is my very first steam locomotive, I’m not equipped with such tools.
Even after hours and hours of extensive search through the internet I couldn’t find firing irons that satisfied my needs. I wouldn’t say there weren’t any, but either they had the wrong dimensions or they were far too expensive for the purpose for which they were intended for. So finally I found myself in a position where I had to come up with my own design.
Shovel
The most important thing – I find – is the shovel to feed coal into the firebox. It should be able to carry as much coal as possible and, at the same time, be slim enough to be maneuverable to the right place inside the firebox. This means not only fitting barely through the firebox opening but also being able to be turned to unload sideways.
Design
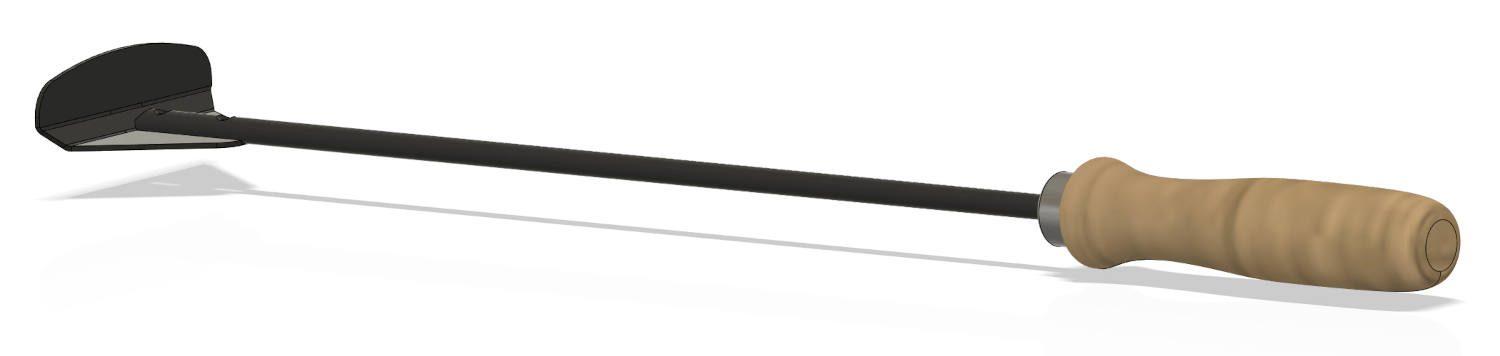
With that (and other designs I’ve seen before) in mind, I began to plan what my shovel should look like. Of course, I could have cut a piece of pipe in half and stuck a bent steel rod to it as a handle – but that wasn’t really the style I was looking for. In the process, I remembered a picture of firing irons on Gentoo’s Journals’ Firing Up Page where the blade was made from a piece of bent sheet metal with a fairly straight steel shaft and a wooden file handle for a grip – which I liked. So I took measurements of the firebox opening of my loco and started CADing. The result turned out as follows.
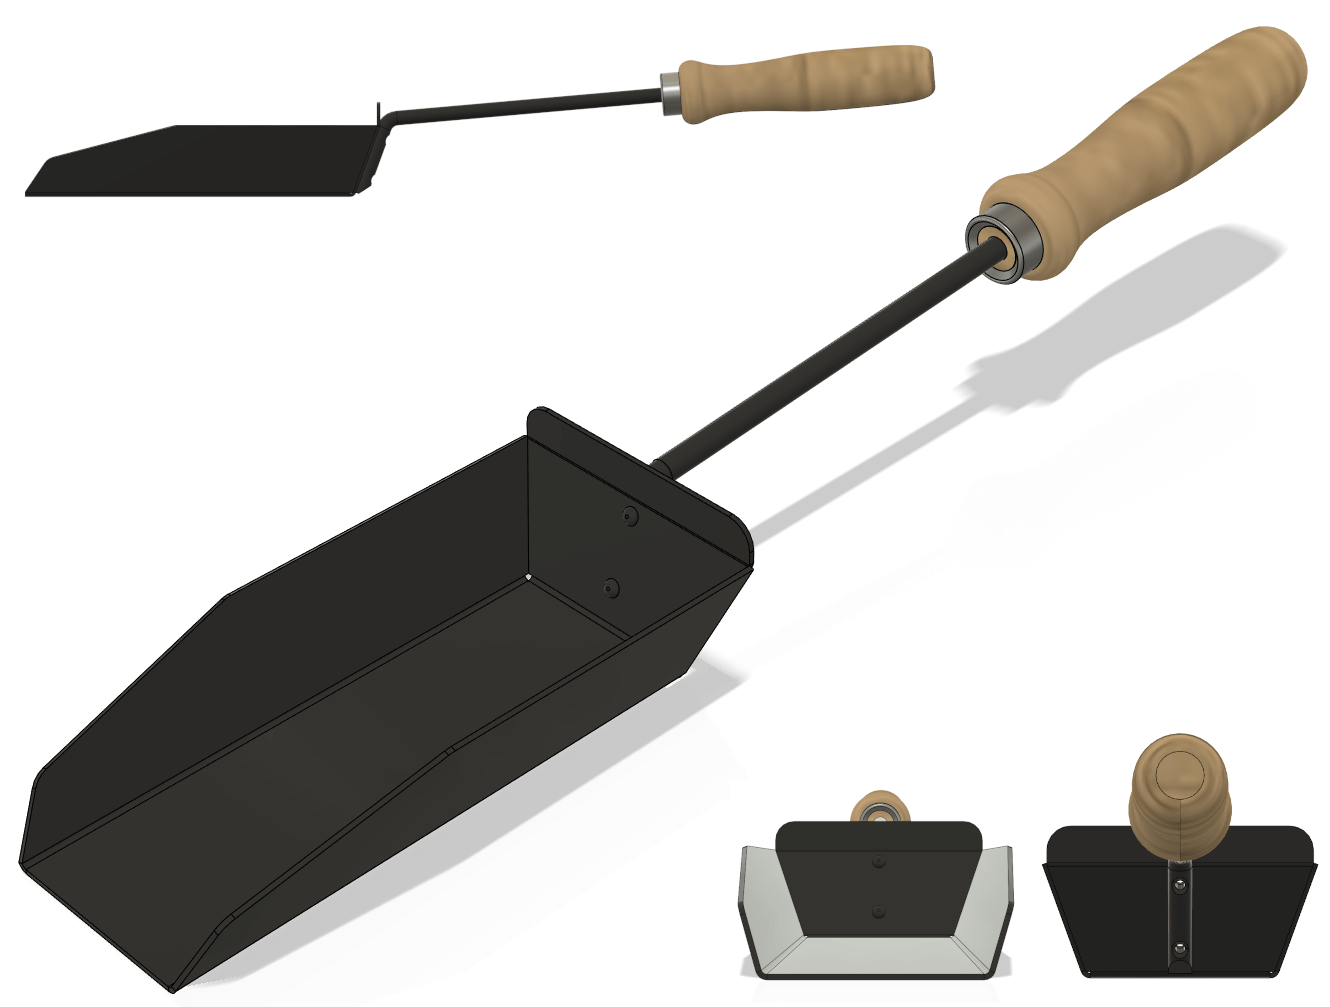
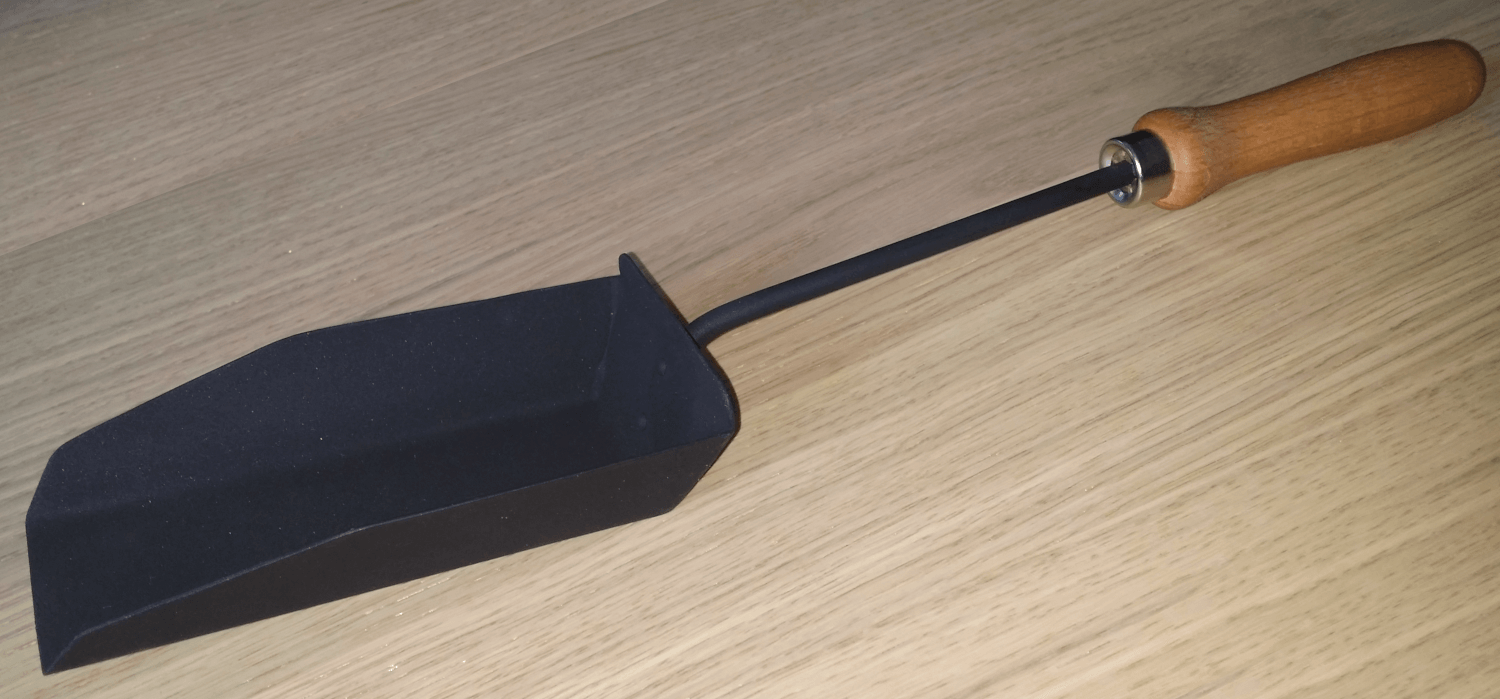
A Blade, approximately 120 mm long, 58 mm wide, and 33 mm high, with a handle/stick (from the backside of the blade to the end of the wooden handle) of 195 mm. The blade is made of 1 mm sheet metal and was brass-brazed at the connecting corner edges after bending. For the stick, I used a piece of 5 mm steel rod. And the wooden handle is a random file handle.
Making the parts was a pretty straightforward process.
Blade
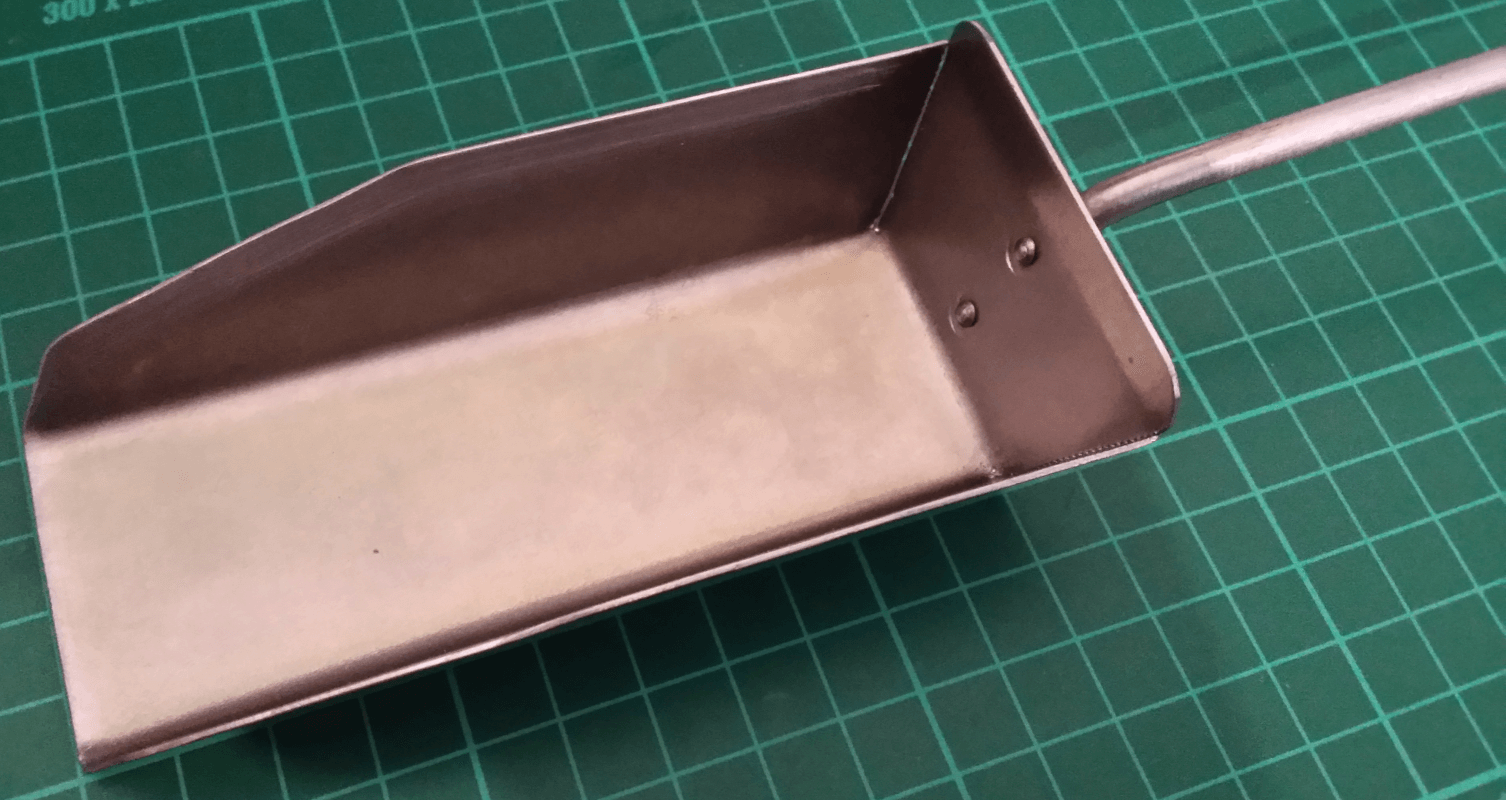
At first, I unfolded the 3D-modeled blade and generated a drawing of it. Then I printed the whole drawing of the unfolded model on a piece of A4-paper. After printing, I cut out roughly the outlines and glued the piece of paper onto my 1 mm sheet metal. I marked the bend lines with a center punch at the inner edges, so they stayed barely visible after cutting the whole thing out with a pair of tin snips. Before brazing, I drilled the rivet holes and bent the part on my vice.
Shaft
The length to cut the steel shaft was determined by its neutral (sp)line (measured in the CAD-drawing) and taken from a piece of round stock. I filed a flat spot (about 1 mm deep) for the flange against the blade, and four more tapered flanges at the other end (like the square shape of a file shaft), where the wooden file handle was stuck onto. Then I drilled the two rivet holes, previously marked through the already drilled blade. Before finally bending the shaft, I also countersunk the holes on the ’not-flattened’ side to allow the rivet’s ends to be hammered/expanded in seamlessly.
Assembly and Finishing
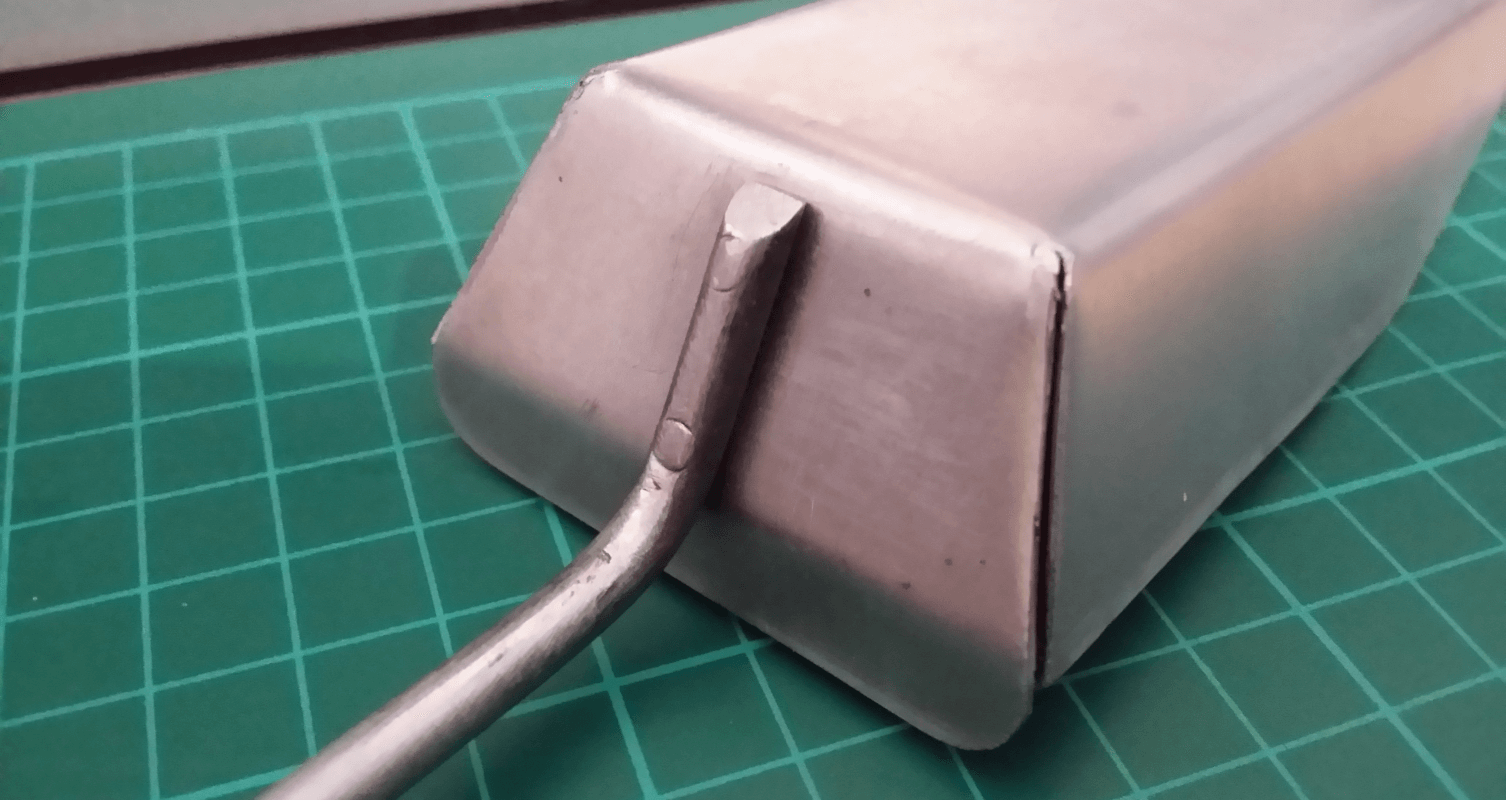
I thought it would be a good idea to attach the steel rod via steel rivets to the blade. But that turned out rather unwise later on, as the rivets can’t handle the leverage force coming from the rod applied to the blade, which resulted in an increasingly wobbly affair between handle and blade. After recognizing my misconception, I decided to ‘solidify’ the situation with some more brazing, as I really liked the little detail of the rivets holding the whole thing together.
After brazing the whole thing together, I spray-coated the blank piece with a fireproof oven paint (I went for an 800 °C resistant rated one) and hardened it on the gas grill with the lid closed at around 180-210 °C for about 40 minutes.
I’m quite pleased with the result – so pleased I thought I maybe can inspire some of you with my design. If you like it as much as I do, and it fits your needs, please feel free to straight out copy it.
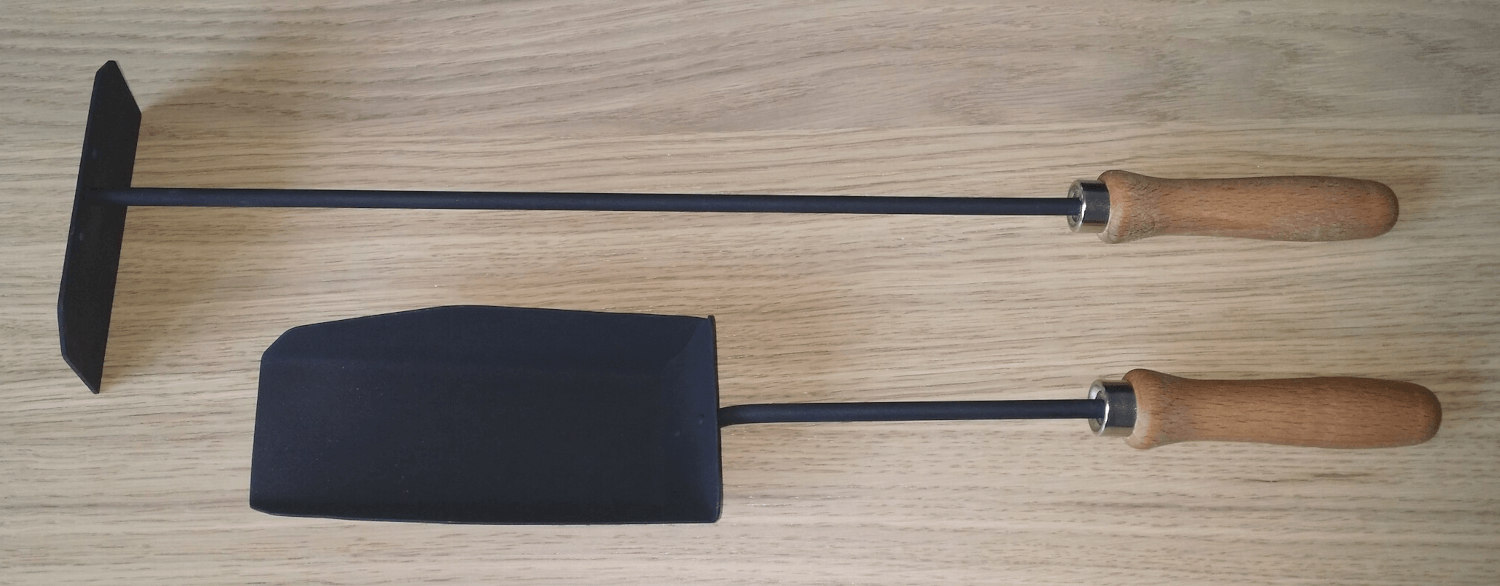
Scraper
The scraper itself was a find in our garden, left behind by one of the previous tenants.
It had some rust on it but, overall, was in a pretty good shape. I shortened the handle a bit, gave it a good brush, and coated it in oven paint. I also fitted a wooden file handle on its end, so it matched the appearance of the shovel. While its dimensions would allow it to fit through the firebox opening, transverse, I’m intending to use it to pull around coal in the tender. Anyway, it would be too globby navigating through the firebox with it.
The dimensions of the blade are 90x43 mm. Its overall length (including the wooden handle) is about 365 mm with a 5 mm diameter steel shaft.
Rake
As of now, the rake does only exist as a CAD model. As soon as this changes, I will update it here.
The basic ideas for the rake were to serve two purposes. One, to stir the fire, and second, to pull the ashes out of the ash pan below the grate. Therefore, it has a rounding (matching the ash pan’s diameter), and I tried to limit the rake’s overall height to an absolute minimum, so it would fit over the remains in the ash pan and also doesn’t poke too deep into a well-set embers while stirring.
The thought about the poke depth originated from the experience in one of my very first runs, where I moved one bit of coal at the firebox opening in such an unfortunate way, that I lost about a third of the well lit embers – cold air was drawn through the grate, which resulted in an immediate power loss of the engine. So I was set back to ‘starting up again’ because the remaining fire was barely able to produce enough energy to keep the blower running.
Downloads
- Shovel 3D-Model (*.step)
- Shovel Blade Blueprint (DIN-A4) (*.pdf)